 When people ask me, “How do you make your drawings?” I usually answer with a wink because I’m sexy. But let me explain the process and how I’m changing the process. I would never call myself an artist; I just make silly (amazing!) drawings and if you are interested in generating online visual content, here’s how I do it.
When I first started making drawings for online articles, I did it the old fashioned way–I drew a stick figure drawing and scanned it into the computer. And that was that. If the drawing required color, I would color it…by hand…with actual coloring tools such as markers or bee blood. This took a while and if I messed up, I had to redraw. (Though my drawings have always been so basic that it would take even a newborn child with limited motor skills a mere eight seconds to recreate my so-called artwork.)
Here’s an example of when I still hand-colored the drawings.

During this time, I was also drawing/writing a book. The book (which now stands at 160-plus pages under my bed, and unpublished) required me to draw and handwrite every page. The problem was my drawing paper was too large and didn’t fit snugly beneath my scanner, so each page had to be scanned twice and the pieces joined together digitally. Complicated stuff. Overly complicated in retrospect, but this was 2007, and I was dumber back then.
To join the two pieces of each page together, I needed a computer program comparable to Photoshop, but less expensive (i.e. free). I searched the internet and found Gimp. Though it sounds like wonky spam-ware, it’s actually a very useful image-editing program that’s as free as wind.
Gimp helped out a great deal. I could now join images together via simple cut-and-past, but more importantly, I could add color and make changes to drawings and save hours and hours of time.
Tip #1: If you want a free image-editing program, try Gimp. It’s not as robust as Photoshop, but the price is right and it can do a lot of cool things.
Now I could color and edit drawings, but I still had to first, ya know, draw them.
I would make a rough sketch in pencil on standard printer paper. Then I would go over the pencil lines with a fine-tip Sharpie on the very same page. Over the years, I’ve come to love the feel of a Sharpie on paper. It has a slightly gritty texture, and the marker doesn’t squeak so much as give off a pleasant, low purr. If you used a lot of Sharpie markers, you know what I’m talking about.
Once the Sharpie layer was finished, I would take an eraser and erase all the pencil lines.
If you ever took an art class, or you have common sense, you’re probably laughing right now. But I didn’t know better. I never took an art class. So I used the same piece of paper for both my rough draft and final draft.
The page, which was now covered in eraser dust and smudges, was then scanned and I would try to remove any lingering pencil marks in the Gimp program. This took about a thousand hours for each drawing.
I’m not sure when, but one day I realized a light box would make things cleaner and faster. So I went to the craft store and bought one that would fit on my lap — The ArtoGraph Lighttracer.
Tip #2: The ArtoGraph Lighttracer is pretty great. If you need a lightbox, get this one. You can find some deals online, but you can also find newspaper coupons for craft stores like A.C. Moore and Michaels that offer 50% off one item. And because light boxes aren’t seasonal, coupons almost always work on them. My light box was originally $50, I think. But ended up paying only $25. Mine is lightweight and basic. I’ve lugged it around to New York and used it pretty hard but it still works just fine. I’ve had it since about 2009 and never need to change the bulb.
Now I would make a drawing in pencil, put that page on the lightbox, and trace the lines I wanted to keep in Sharpie. Then scan, then edit, then color, etc. It was easier and everything flowed smoothly once I got into the rhythm.
And this is how my drawings were “computered.” Most of Blogging Twilight, all of Blogging Harry Potter, and everything in between has been done this way.
Here’s an example. You can see in the original sketch there was a woman. She got edited out of the Sharpie draft. Poor thing.

Now I’m trying something new. I’ve had an iPad for a while but use it mostly for watching movies and reading/writing emails on the go. For my birthday last year, my girlfriend got me a Nomad Brush — a stylus paintbrush. It works great, especially with fun painting apps like ArtRage.
I’ve used ArtRage to make interesting, funny, colorful digital iPad paintings, but because the app was paint-focused, it wasn’t ideal for trying to make my line drawings.
Then I heard about Sketchbook Pro. This $5 app is exactly what I needed. Though I just started using it, it’s fantastic.
I can make my pencil drawings using the pencil tool, add a new layer, go over anything I want with the pen tool, edit, color, and then save to the mythical cloud. Then I can make it rain art whenever I want! Mwah-ha-ha!
I’m using a stylus pen (not sure what brand it is, but it seems generic) and so far, so good. I wish the pen were a bit lighter and the tip a bit finer, but I still like it.
I need to play around with the settings of SketchBook to get the lines I’m used to. But damn, this app is impressive.
Sure it’s great for simple line drawings, but it can do much more….more than I’ll ever need. From the brush selections (there’s a “brush” that’s the shape of an eyeball!) to the ability to mirror the page, I spent a lot of time messing around with the options. Everything is intuitive and unlike other art apps, I never felt frustrated or frazzled because the program wouldn’t let me do something.
I made this work of art in exactly 30 seconds. I call it “Ummm…Okay.”

So that’s that.
Tip #3: If you have an iPad (or Android tablet, or iPhone, I assume), get the SketchBook Pro app.
Note: SketchBook has not paid me to write this. But if they wanted to buy me a boat, well…I’ll take a size XL. Red.
As I post Monsters of the Day, I’ll be using this app and trying new things. It will be a fun learning process.
I haven’t given up the paper/Sharpie method, because I still like the feeling of Sharpie markers and real markers are still better at creating detail. But I like adding new ways to make content. And now I can work from anywhere, even in a blimp!
If you’re looking for ways to easily make digital art, there are probably thousands of options. My method isn’t perfect; it just works for me.
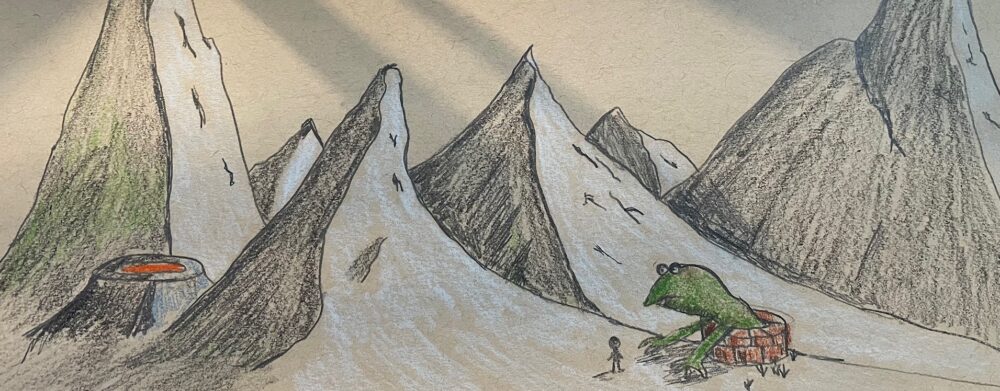
Now go make a picture…of a dinosaur…fighting Zorro. (I did!)
